This is how I make red notebooks like Jarod uses in The Pretender. There may be a video at some point, because I have a tendency to make things sound more complicated than they really are.
Supplies Needed:About fifty sheets of white lined paper, filler paper, etc. (Basically anything that looks like
this. I use college-rule filler paper.)
Red cardstock/coverstock or a red file folder you can cut up
1/2 inch binder comb, black
Paper cutter,
rotary trimmer or scissors
Comb binding machine or access to one
Ruler, straight edge or something to measure with
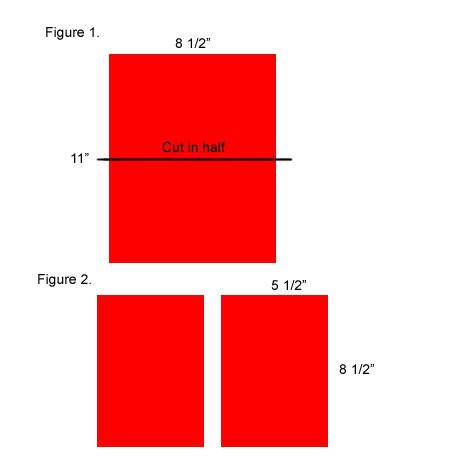
Step 1: Measuring and CuttingGetting a size I liked took me a bit of work when I first started, cutting up spare red files. I eventually settled on a measurement of 8 1/2 inches by 5 1/2 inches for the cover and slightly --and I mean
slightly-- smaller for the lined pages. Truth be told, you can make them all the same size.
With a 8 1/2 by 11 sheet of cardstock cut down the middle, you have the front and back covers finished. (
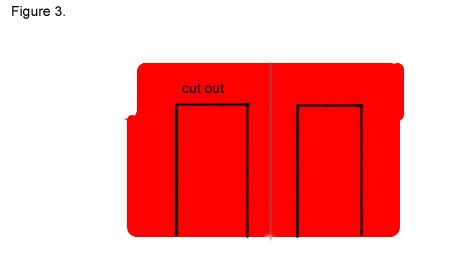
Fig 1 and 2) When I used to use file folders, I cut one cover out of each side. (
Fig 3)
Next, cut the lined paper to size. You can use a pair of scissors or a rotary paper trimmer. I use a paper cutter like
this now. Try cutting the fifty or so pages of paper by hand or with the rotary trimmer a few times and you'll see why I don't use them anymore. ;) Anyway, as is shown in
Figure 4, cut between the margin lines if you've got them. As is
not shown in
Figure 4, please cut from the top of the paper, keeping the larger white space instead of cutting it off. Moving on...
Step 2 - Punching the Holes for the Binder CombI use a machine like
this one to bind my notebooks. I don't think you should actually have to
buy one, especially if you're only making one notebook. Perhaps a local office supply store would bind the book for you (for less money than the machine, I'd expect). Anyway, it was the first piece of specialized equipment I bought for these because I couldn't find a way around it.
All right, then. Use the machine as instructed to punch the holes in the cover pieces. After those are punched, take the recommended number of sheets of paper (mine does 6-10 at a time) and punch them until all fifty are done. Keep them lined up and in order. And remember to punch the holes in the same side of all the sheets. I've messed up some sheets that way.
Step 3 - AssemblyPlace your 1/2" black binder comb on the binding machine, as per manufacturer's instructions. Thread the back cover onto the open comb, followed by the filler sheets and finally the front cover. Do whatever it is you do to close the comb and remove from the machine. Enjoy!


![[personal profile]](https://www.dreamwidth.org/img/silk/identity/user.png) sireesanwar:
sireesanwar: